Options Window
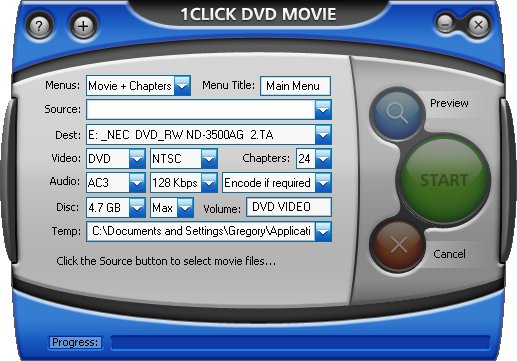
Options:
Menus: There are four different menu
options available: "None", "Movie", "Chapters", "Movie + Chapters". The
default value is "Movie + Chapters"
- Choosing "None" will ensure that no menus
are added to your movie - this setting is ideal if you have only one movie
file.
- The "Movie" option will create a menu
containing a single button for each movie file. The movie file name (less
the file extension) will be used for the name of the menu button, so you may
want to rename your movie files before you add them.
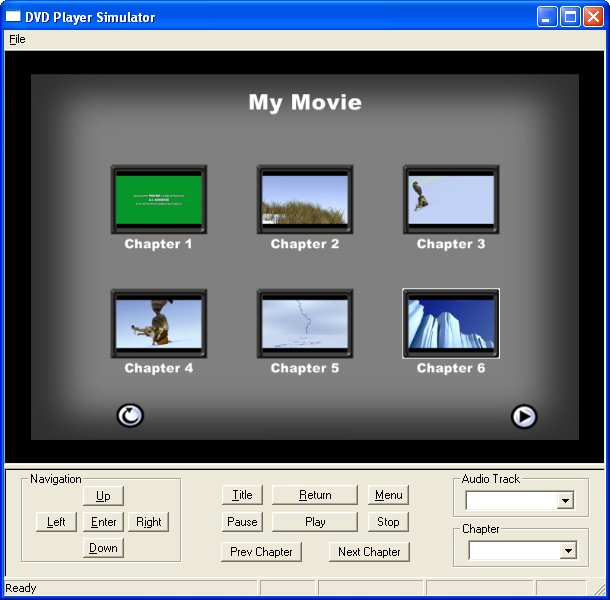
- The "Chapters" option will create a menu
containing a single "Chapter" button for each movie file, and a sub menu
containing a thumbnail picture button for each chapter of the movie.
- The "Movie + Chapters" option will create a
menu with both a movie and chapter button, with the corresponding submenu
for chapters.
Menu Title: You can choose a title for the
main menu. By default, the title is "Main Menu".
Source:
Click the "Source" button to add movie files. Once the "Select
Movie Files" window is open, you can can select more than one movie file at a time file by holding down the "Ctrl" key
while clicking the left mouse button. Another way to choose Source files
is to drag and drop the files into the Source window. Please note that
software will use the name of the file (less the file extension) for the title
name in the menu, so you may wish rename your files before you add them to the
project. (ex. file name: "My Birthday.avi" will become "My Birthday" in the
menu.)
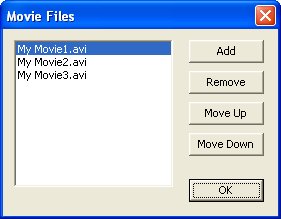
You will also be presented with the "Movie Files"
window so that you can add more files (from different folders) or change the
playing order of the files using the "Move Up" and "Move Down" buttons as shown
below:
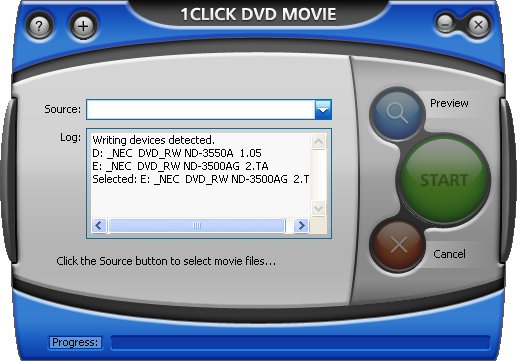
If you want to burn a DVD from a 1CLICK DVD MOVIE
project that you created, simply select the "1Click.dvd" project file located in
the project's "OpenDVD" folder. For example, if your Destination path is
"C:\Movies" and the Volume name is "DVD VIDEO", you'll find the "1Click.dvd"
project file in the "C:\Movies\DVD VIDEO\OpenDVD" folder.
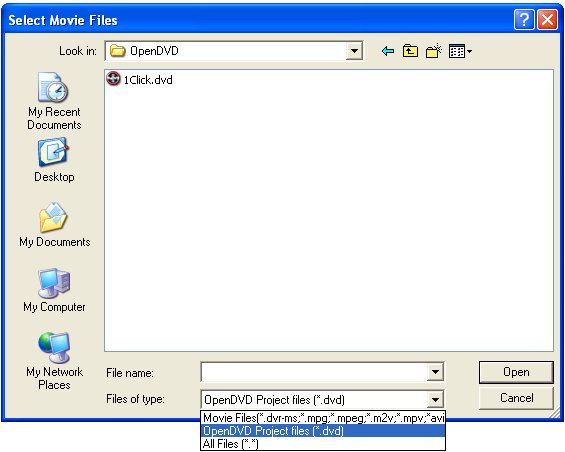
To view the "1Click.dvd" file, select the "OpenDVD
Project files" item from the "Files of type:" drop down box as shown below: Once
the project has been loaded, simply click the Start button to burn the DVD.
Destination:
Use this option to select a drive letter corresponding to the device you
wish to save the DVD onto. If the drive letter you select is a DVD/CD
writer, you will be asked to select your writer from a list of devices installed
on your computer (you may have multiple writers). You can also save a project to
a hard drive folder if you don't want to burn it right away. 1CLICK will
attempt to select a DVD writer by default. If you have more than one DVD writer,
you may wish to select a different device.
Video:
Use this option to select the type of video disc you want to create. The default
is 'DVD', however you can also make a VCD or SVCD. Each movie type uses a
different compression scheme. Choosing 'DVD' will result in the best
quality. The other two types are lower quality and in many cases unless
the original move file is of short duration, the disc type may not be large
enough to hold the entire movie. The default value is DVD.
Format:
Use this option to select the broadcast standard (format) of the DVD. If
you live in the United States, the format to select is "NTSC". Other countries
like those in the European Union may use "PAL" as the broadcast standard. The
default value is NTSC.
Chapters: You can select the number of chapters you wish to have in your
movie. The number of chapters you select is applied to each movie you select in
the Source. The default value is 12 chapters.
Audio: There are three types of audio available: PCM, AC3 and MPEG.
Depending on the type of Video and Format you have selected, they may not all be
available. By default, for DVD movies the audio type is AC3 because of
it's superior compression and sound quality. PCM audio uses much more
space on a DVD and will leave less room for the video information, so it's not
recommended. The default value is AC3.
Bit-rate: You can choose a bit-rate for the audio. The bit-rate
determines how much compression is used to store the audio information.
The default setting of 128 Kbps for AC3 is the recommended setting and will
preserve as much space as possible for the video information.
Encoding: You can choose to re-encode the audio for all files, or to only
encode all when it's not in the correct format for the selected Video disc type.
The default value is "Encode if required".
Disc:
Use this option to modify the disc (target) size of the movie. Depending
on the disc capacity of the media (DVD/CD) you are writing to, you may wish to
modify the default value provided. You can also use the "Disc" size option to
set the target size for movies saved to your hard drive. The default value is
4.7 GB (for a DVD).
Burn Speed:
Use this option to select your preferred DVD/CD write speed. If the chosen
speed is higher than the maximum speed of the DVD media, the software will
choose the maximum speed allowed by the media. The default setting is "Max"
which works well in most cases, however if you encounter burning errors we
recommend you choose a lower writing speed (4x has shown the most success)
because some brands of DVD media will not burn well at their maximum rated
speed.
Volume: The "Volume" is the name which will be written on the DVD
disc. The default value is "DVD VIDEO".
Temporary: You can change the folder that
the software uses to write temporary files while
encoding. This folder may need to be as large as 12 GB in some cases
(depending on the Disc size).
By default the software will use a folder in the Windows Application Data
folder. (ie. "...<Username>\<Application Data>\1clickdvdmovie\Temp").
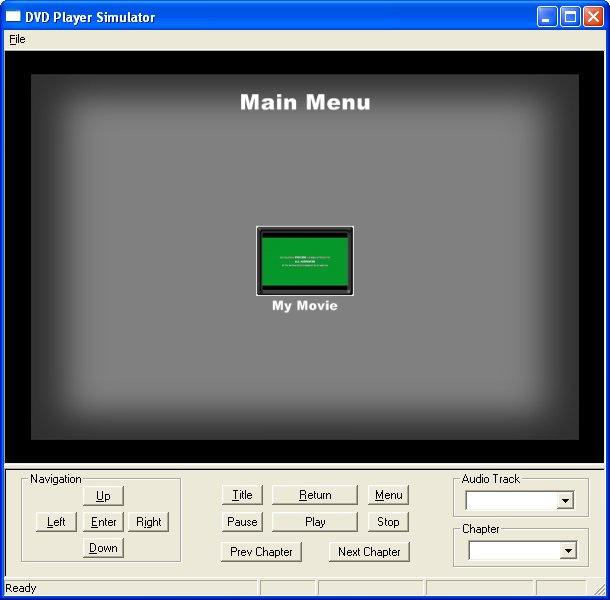
Preview:
Use this option to preview the project prior to converting the movie
files. If you have enabled one of the Menu options, you will have the
opportunity to view and try the menus which will be created on the final disc.
You can click on the on screen menu buttons using your mouse or simulate using
your remote control by clicking on the remote control buttons. Note that there
is a short delay each time you change menus while the simulation engine
computes the next menu.
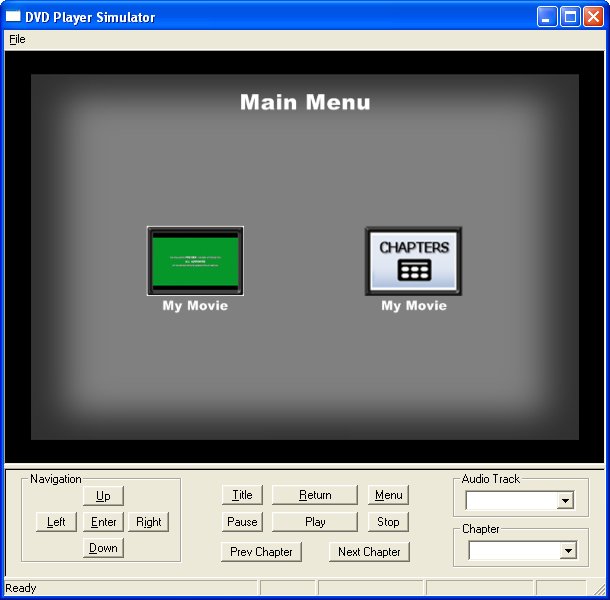
Preview Window
(Movie Menu)
(Chapters Menu)
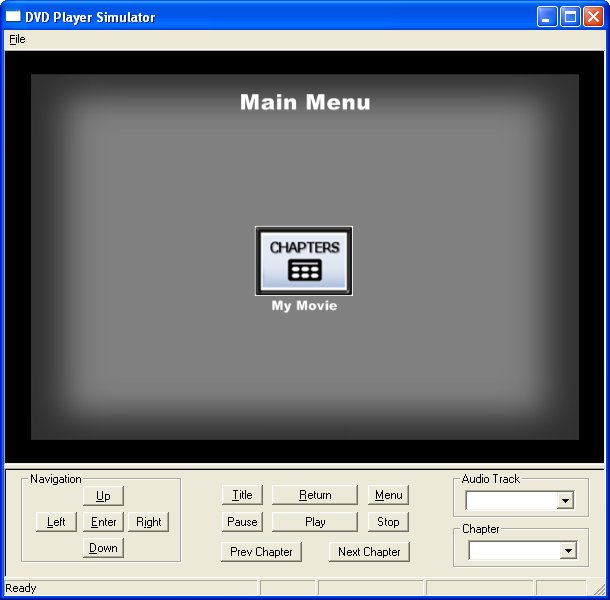
(Movie + Chapters Menu)
(Chapters Sub-menu)
Shortcut keys:
F1:
Opens this User Guide in your internet browser. F2:
Open the Registration (activation) window.
F3:
Enable or disable notification of new updates to the software (you need an
internet connection to receive update notification).
F8: Opens the
1CLICK DVD MOVIE log file. You can save this file to your desktop and attach it
to an email when contacting customer support.
 |
 to view the Options Window
- click again to return to the Main Window (default).
to view the Options Window
- click again to return to the Main Window (default).